Friday, March 28, 2014

How to make cell phone holder

This is the most lovely project I ever made. It is easy, inexpensive and done in noooooo time and the result is amazing :D. I always looking for my cell phone around the house. Do you? Yes I know. We all do. We waste sometimes looking for our cell phone until we give up and ask someone to call us to find it. I made this lovely gorgeous DIY cell phone holder today and it looks beautiful.

How to make cell phone holder


 It is made out of resources that you already have in your house. Let's start

  You will need:

1 - One single sock
2 - scissor
3 - Good amount of fiber, you can use half amount or less of an old small pillows.
4 - elastic thread
5 - Old CD
6 - A needle and
7 - Hot glue gun


How to make cell phone holder

1 - Roll the toes of the sock (the closed end) to get this flower look, secure it with elastic thread and cut with scissor.

How to make cell phone holder

How to make cell phone holder

2 - Turn the sock inside out and insert the CD inside it.

How to make cell phone holder

3 - From the hole of CD pull the sock from the other side.

How to make cell phone holder

4 - stuff with fiber over the Cd and around the sock tail.

How to make cell phone holder

5  - Turn the sock and insert the CD again through the sock tail making the fiber to be inside them . You should face the right side of the sock now after you flipped it in the first step.

How to make cell phone holder

This is from the back to show what  I mean. Just cut the tortuous remains of the sock - if exist -  to make the holder stands properly on a flat surface.

How to make cell phone holder

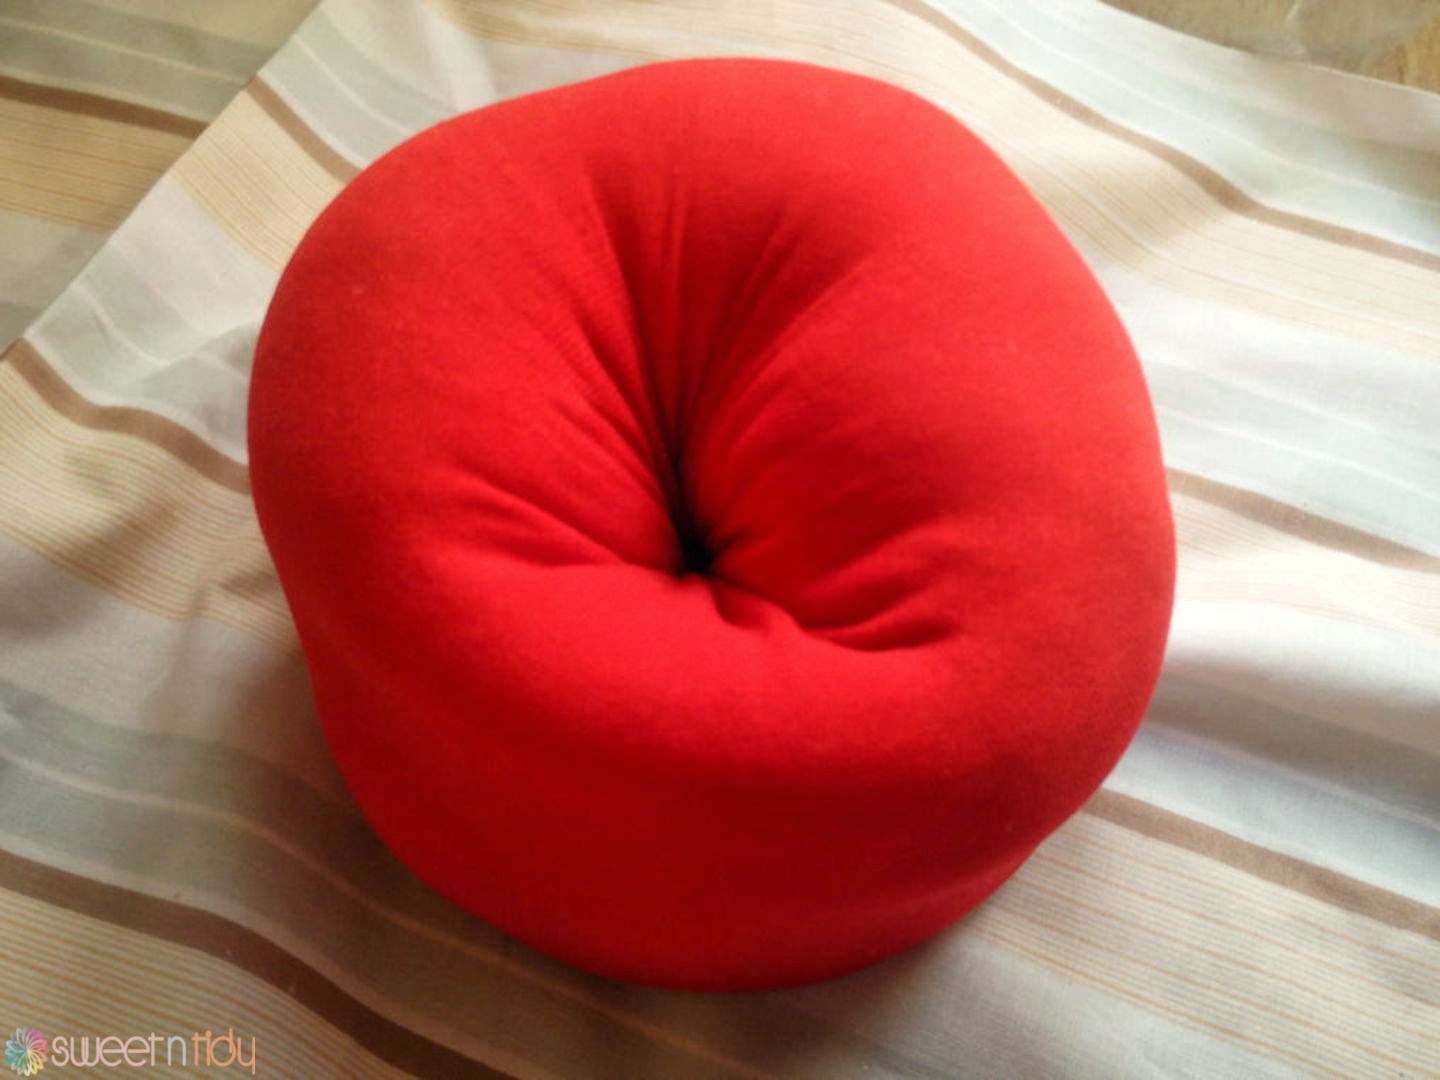
6 - With your fingers or with a needle adjust the fiber to be tidy trying to make a sweet shape as shown in the next picture and add the flower with the glue gun.

How to make cell phone holder

7 - Put your cell phone.  You are done :D.

How to make cell phone holder

How to make cell phone holder

This was also free inexpensive DIY that you can make in no time and you will have much fun. Just a quick note that it will not work very well with REALLY BIG cell phones like Galaxy Notes. You probably gonna need to work with a box lid rather than the CD. I hope this was helpful for you. I am waiting for your feedback, comments, questions and responses with pictures. Your responses will be the talking center next time of-course.


This post has been featured/shared in 

Reuse it : Sticky notes holder to store drink coasters

Another quick post I wanted to share. I was thinking about the square shape of the drink coasters that we all have cluttered everywhere in the house. We get them everyday as commercials when we go to any store we get them for free in special occasions like new year, Christmas and so. It looks like sticky notes squares, so I thought about the sticky note holders to store them different wheres in the house.

Reuse it - Paper note holder to store drink coasters


Again, it's in no time, free and inexpensive. Let me know your feedback, comments, questions and responses. Your responses will be the next talking center of-course

Thursday, March 27, 2014

I am inspired : Easy free bathroom organizer in no time

One of my quick projects I adore, is this simple shower organizer I have inspired from Real-Simple. While I was searching about bathroom organizers, I got some great pictures that most of them depend on drilling the walls which is not an option for me or for you if you are renting the house. I can't have too many holes in the walls everywhere specially for cabinets and shelves. So I had another options.


I am inspires how to organize bathroom free shower organizer

Yes exactly !! In my kitchen. This baskets tower I used for a long time to store onions and potatoes and I didn't realize that it has gorgeous baskets you can use anywhere else. I spent too many times thinking what else can I store in it ? I had nothing else to store here, and I missed to ask where else can I use baskets that I don't need. I removed the last basket and you can guess where did I  use it :D.

I am inspires how to organize bathroom free shower organizer

I removed it, and with a thick road I hanged this beautiful basket in an pre-installed hook in the wall to store all  my husband, my baby and my shower supplies. It looks beautiful, gorgeous and it is inexpensive. I didn't pay anything for it and I made it in no time without drilling in the wall. Isn't it look Sweet N Tidy :D?.

I hope this was helpful for you. Everybody has a adjustable basket towers somewhere. You can do it.I am waiting for your comments, questions, responses with pictures and projects and your feedback. Your responses will be the next talking center next time of-course.

How to organize pots and pans

Hey. It's the middle night here trying to spend this time usefully and organize my pots and pans cabinet. Actually I used to hate to grab pots from it because it was messy and I had to carry heavy things to get what I want. But after I organize it, I keep opening it as I go :D . I did organize this cabinet while my baby is sleeping. Can you imagine how hardly to play with pots while your baby is sleeping a even a mile away? It was late at  night, so sorry for the little darkness.

This was my pots and pans cabinet before organization. It was messy and each time I try to get a pot I had to carry heavy pots before I reach to what I wanted with unknown lid. In addition, there are too many pots I rarely use and they take much space. As a result, I put my daily two or three pots and pans in a separated kitchen island to avoid using the cabinet. The pots I ALWAYS use EVERY SINGLE DAY. I will show you it in a separated post. So this cabinet has my rest of pots.

How to organize pots and pans


Add contact paper instead of plastic covers

As you see the cabinet was messy and I used to add any cover like ugly plastic cover. What I did is to clear everything out, wipe the cabinet and add CLEAR contact paper which I think is gorgeous because it is clear.It seems that you don't put anything under things, no folds created when you pull a pot, it is shiny and easy to clean. Also baskets and containers are sliding nicely over it. You can see the difference between the two shelves after wiping and adding the contact paper.

How to organize pots and pans


Put what you rarely use away


I figured out which pots that I rarely use like when I have too many guests or have party which of-course happens once or twice a year. No one has a party everyday. Anyway I got all of these pots I rarely use and put them inside each other and put all of them in one of the lower corner. This works often for the biggest pot of each pots set you have, because they are very large, or for the pots you only use in big meals, parties, barbecue, dish parties... etc .For the Tefal pot I added some tissue paper in order not to be scratched by anything I will put inside.

How to organize pots and pans

Organize according to usage


I organized the pots from what I use daily to what i use rarely. I tried to make them all to be easy to grab without carrying any heavy things. Also I put the baking trays vertically which maximized the space and easier to pull. You can see how shiny is the clear contact paper and easy to clean.

How to organize pots and pans

Try to maximize space or add double shelves


To maximize the space, I used this serving dish which I don't use any more for serving and put inside to give a height and also kind of adding space or an additional shelf inside the cabinet.

How to organize pots and pans

I know it didn't save much space but it worked. It may shows how it works better if I have a larger pot above it. But if you have one that is taller and bigger it will work amazingly. I may put the pots over it and grab something in-front of it so I can easily grab everything. If you can see when it is behind I can easily grab what's behind and what's in front.
How to organize pots and pans

Or you can use something similar to this. this is a part from a basket tower used usually for storing onions and potatoes. You can add pots under it and above it.

How to organize pots and pans

 But unfortunately it didn't work for me. It seems like it is very hard to reach the above basket. So I didn't use it. Any suggestions? 

 If you have something similar it will work for you perfectly without going to the store and buy an expensive double shelves right?

Finally, this is the result and honestly, I am seriously thinking about put back my daily pots to the cabinet as well as I planned to organize my food storage containers. I promise to keep you up to date with these ideas.

How to organize pots and pans


I hope these tips were helpful. I am waiting for your feedback, comments, questions and responses. Your responses will be the next talking center of-course.

Wednesday, March 26, 2014

Reuse it : Clothes clips to close small bags

Just a quick idea I would like to share with you. Some of small bags that hold seasoning are hard to close for future usage. I got this idea while I was in my dressing room. This lovely pin was holding my husband new shirt and I thought why didn't I reuse it for something useful ? check this out.

Reuse it - clothes clips for closing small bags


I am sure your already have something similar holding your new socks together. Go and reuse it!! This can work with ANY small bag like small snacks bags, gum bags or dry soup bags . I hope this tip was really helpful. I am waiting for your replies, comments, questions, feedback and responses. Your responses will be the next talking center of-course.

Sunday, March 23, 2014

Free front door organizer at no time

Most of husbands like to free their pockets once they come home. Their pockets have the money, coins , receipts, wallet and accessories.

With a little effort, you can help your husband, father, brother, son .. etc, to get organized immediately with no time or effort.

This was my front door before organizing. The counter is messy with accessories and receipts.

Free front door organizer at no time

First of all for the coins I used this coins manager but I didn't like it's look, so I covered it with contact paper

Free front door organizer at no time

Free front door organizer at no time

My Husband doesn't like to make everything to be REALLY OVER organized, so I didn't get  the organizers that divide everything like cell phone, accessories and keys. It wasn't suitable for my husband.

So I got this bowl as a gift from my mother in law and it looks gorgeous. When my husband comes he puts everything inside and that's all. And for everyday receipts I simply put an envelope inside.


As you see I organized the front door and helped my husband to get organized in no time for free. I am sure that Everybody has a bowl somewhere. It's free and easy. I am waiting for your feedback, responses, comments and questions. Your responses will be the talking center in the next post of-course.

Friday, March 21, 2014

How to make mini display stairs shelves

One of DIY storage projects is  this gorgeous mini display stair shelves that I made for storing my beads jars. I have to tell you that I had much fun when I was working with this project. It was easy and you have it for free. I like the stairs shelves because they are easy to use and you can grab whatever you need with no time because you can see everything. Also you can easily grab what you need without any need to remove anything in-front. I show you how to do it. I have done my best in the next pictures to draw this for you :D . I hope they are helpful and clear.


How to make mini stairs display shelves

You need


1 - Any card board pieces.
2 - Cutter and cutting board.
3 - hot glue gun.
4 - Glossy contact papers.

Step you will follow


1 - Cut the cardboard as shown in the picture below. Let's assume you have the following depth for the space you like to add your shelves on. Measure the height of the space. Measure the jar height. You will have the height of the shelves to be height of the space minus height of the jar leaving extra 2 inches for easy use. Shelf width will calculated according to number of shelves you want to make. For here I made 3 stairs and used the ground as well. So I need to divide the space by 4. Each step is going to be half of the previous step. I promise you will understand more when you carefully see the picture below.

How to make mini stairs display shelves


2 - Collect the pieces of card boards as shown in the previous picture in the left bottom corner and glue them with the hot glue gun.

3 - Cover the body with the glossy contact paper as shown.


I liked using the glossy paper because it wasn't easy for the jars to fall down or to move while I am moving the shelves. They are secured in their places. If you are more interested, there's a big surprise in this stair shelves here.

If you liked the ideas, please leave a comment below. I am waiting for your responses, comments, questions and feedback. Your responses will be the next talking center of-course

How to make time manager out of foam board

When I got my first baby, everything was turn upside down, I had no time to do anything, all my time was spent in failed trials to calm my baby down, stop him crying and try to figure out what he wanted. Everything was messed up. Laundry stacked over. Dishes were dancing in the sink. Everything was messed. Like a new mom I was frustrated and disappointed. It seemed that I failed in everything. I couldn't take care of my baby neither my home.

To step up again  I spent most of my time trying to fix everything, and again it seems that I turned the coin up. I took care about home but most of the time my baby is setting on the bouncer in-front of  the TV  with nothing to learn and no one to play with. Of-course I was doing the basic duties for him, but I had no time to have fun with him, read for him, or teach him something. I had no time to spend with my husband, no also time to spend for myself !! I was spending all the time fixing the stacks and piles. I spend much effort cleaning a room while laundry was screaming fixing messed crafts while the dishes are in the sink. Again, I failed. I couldn't care of neither home nor my baby .

Luckily I was in a vacation of my job, or I would be in a miserable situation. You can also imagine my social relationships state. I was always missing that I need enough water or to communicate with people. I missed a lot of things.

There was something wrong . I couldn't figure out that it was the balance, I have to balance the scales.

What I want you to do now is to grab a paper and write down EVERY SINGLE THING you want to keep doing it during your day. For example I wanted to keep my social relationship good, so I wanted to be sure to pick one of my friends or relatives name everyday to call or keep in contact. When I did, I rarely miss something of this. Everything is going well.

I know I talked too much but I just needed to tell you how I was without time manager. I made a time manager out of foam board I got from my TV unboxing. I will show you how to do this super inexpensive time manager out of a foam board you may throw it away.

You will need

1 - foam board
2 - fabric
3 - scissor
4 - stapler
5 - pins and nails
6 - transparent contact paper


How to make time manager out of foam board

I cut the fabric to the size of the board I have leaving one or two extra inches in the edges.

How to make time manager out of foam board

Iron it and this is optional, and pin it from the behind of the board using pins and the stapler.

How to make time manager out of foam board

I printed out my calender, everyday duties, to-do list, shopping list, goals and ideas. Then I covered them with the transparent contact paper which is perfect for writing and erasing markers without buying a magnetic white board. If you want these printable please let me know by leaving a comment below.

How to make time manager out of foam board

I needed a container to put markers and sticky notes so I got a cardboard box, covered it with fabrics and attach it to the board back with the nails

How to make time manager out of foam board

Another nails for hanging it on the door

How to make time manager out of foam board

And I had fun.

How to make time manager out of foam board

I hope this was helpful for you. I am waiting for your comments feedback and responses. Your responses will be the talking center next time of-course

Sunday, March 16, 2014

How to make a magazines holder

In this post I am going to show you how to make a magazine holder for your office room. It is made out of cardboard. That what makes it super easy ,super inexpensive and reliable. So if you have magazines, printing papers, Notebooks or any small books cluttered over here and there in your office room, you can make this beautiful Sweet N Tidy folder to collect  your office clutters for you NOW.


How to make magazine holder - office room


You will need:

1 - Any piece of cardboard available.
2 - cutter.
3 - Hot glue gun.
4 - contact or gift papers
5 - white papers

I guess the most of items are available for you. Bring them and let's go

1 - Cut the piece of cardboard as shown in the next picture

How to make magazine holder - office room

 x refers to the height you need for whatever you like to store in the folder. Magazines, notebook or small books. Just measure the height of them then you will have the x value.

z refers to the width of the magazines.

y refers to the width you like for the folder. It's your choice. It may be related to the number of magazines you would like to store. If they are too many you will need big width. If just few magazines you will need small width and so on.

2 - After cutting the cardboard collect the pieces you cut with the glue gun as shown in the next picture.

How to make magazine holder - office room


3-You only need to cover with the contact paper outside and white paper inside.

If you have only gift paper as I have you will need a glue to cover them.I mad three of them one with this pink lovely gift paper.

How to make magazine holder - office room

One with this colorful beautiful gift paper

How to make magazine holder - office room

The last one with purple and lilac gift paper.

How to make magazine holder - office room

I really enjoyed doing them as well as enjoyed posting them. Organizing is much fun than you think. I am waiting for your feedback, comments and responses with pictures and videos. You responses will be the next talking center of-course.

Thursday, March 13, 2014

Free decorative item around your home

Its true I go with the concept of throwing away anything you don't need, but if it really looks reusable, why don't we keep it? especially when it returns to be useful. This decorative plate I got from the supermarket and it was holding some dates.

Free decoration ideas in your house

It looks clean and tidy like you can not throw it away without asking yourself what can I use it for ? 

Free decoration ideas in your house

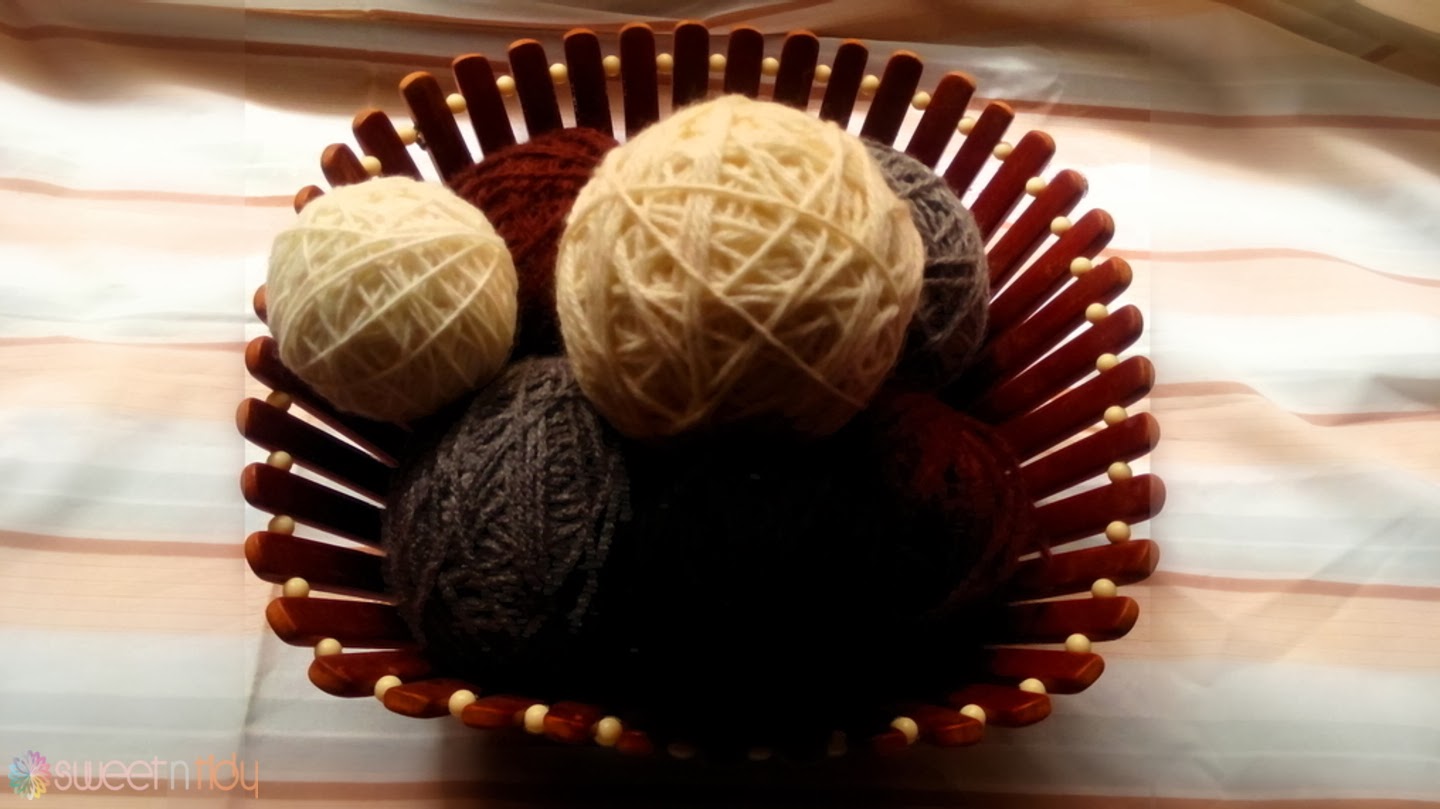
Actually you can use it for too many things. But I was thinking to use it as a beautiful decoration piece. When I was in a tour in Ikea, I saw these little gorgeous decoration torka balls.


They are simple and uni-colored. I loved them but I didn't buy them. I was in a harry and this little beautiful plate came into my way while I was organizing. I was in my craft room organizing my coroche rolls.  Coroche often comes with this shape.


Free decoration ideas in your house


I turned them into nice balls shaped like this.

Free decoration ideas in your house

It looked much similar to the balls I saw in Ikea. I just secured the end of the thread by passing it through the ball. I don't know if you can see it. I did my best to catch it with the camera.

Free decoration ideas in your house

I came up with some colors and made the same thing. I picked the colors matches my living room colors.

Free decoration ideas in your house


And with my beautiful plate I made this nice look.


Free decoration ideas in your house

 And for this nice bowl, I bought it from home store and it was inexpensive. It cost few cents.

Free decoration ideas in your house

 Aren't they look simple, tidy and beautiful decoration pieces? Please let me know your feedback, responses and comments. Your responses will be the next talking center of-course. I am waiting for your pictures and ideas about home organizing and DIYs.