Thursday, July 31, 2014

Things to care about when you are doing laundry

Today I will share things you have to take care about when you are doing your laundry because I noticed some popular problems when wives make laundry.

Thing to care about you are doing your laundry

For example when you have a shirt that you hand washed, it will be full of water. If  you hang it with clothespins as shown in the wrong section the pins will create creases in the shoulders of the shirt because it was heavy and full of water when you hanged it. To avoid this leave it horizontally on a table or an internal rag until it dries.

Thing to care about you are doing your laundry

Also if you a have cotton shirt, don't hang it  from bottom as shown in the wrong part above, because it will end up with damaged shape. Cotton is easy to stretch when it is wet so be-careful. To avoid this fold it into half and hang it from under sleeves like shown.

Thing to care about you are doing your laundry

When you have a dress that has lots of buttons and accessories it's better for you to turn it inside out because if you don't you may find all the buttons and accessories in the washing machine.

Thing to care about you are doing your laundry

Some bad clothespins made of iron make some rug stain on the clothes when they are wet. Be-careful and use the plastic pins.

I hope you find this post helpful. I am waiting for your feedback and comments. See you next post.

Wednesday, July 30, 2014

How to organize origami papers

As I said before I am so crafty person . I like crafts so much . I have  too many origami papers which I use to make very beautiful origami shapes. All what I did to organize them is to get a shoe cardboard box and covered it with contact papers and made cardboard dividers for it.

How to organize origami papers


Here is how to do it

How to organize origami papers


I cut 3 pieces of cardboard  W x H and two pieces D x H. In equal spaces I cut  H/2 stripes inside the cardboard pieces to make room for the mutual cardboard pieces to in like a mesh. It now fits all my origami papers . Also my folded origami pieces .

How to organize origami papers

A quick tip . If you have small pieces of origami papers remained from your projects just group them with elastics  or rubber bands. 

How to organize origami papers

And this is how I organize my origami papers. I also grouped them by colors to make it easier to use.

How to organize origami papers


I hope this post was helpful . I like to see your comments and send me your pictures about any craft organizing you made. Thank you for reading . See you next post

Tuesday, July 29, 2014

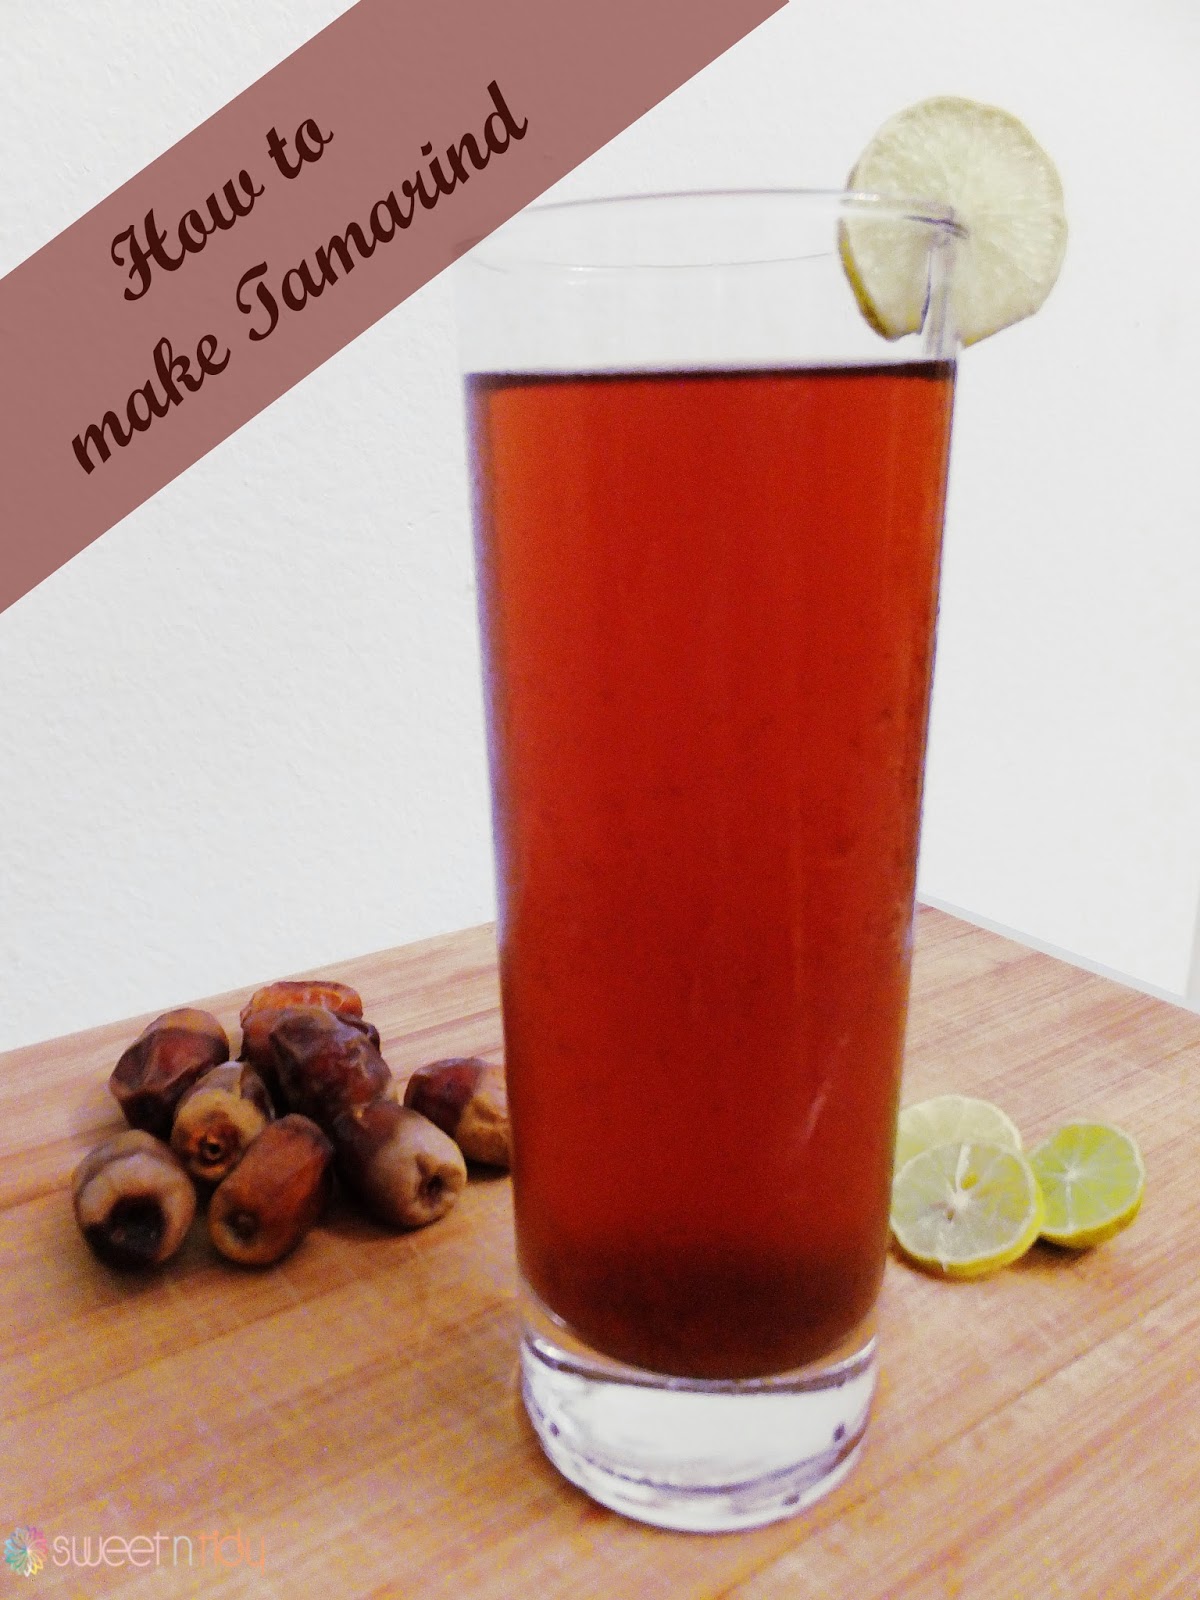
How to make Tamarind juice

Today I will show you how to make Tamarind. Tamarind is a very famous drink in Egypt specially in Ramadan.  We drink it after or before "Iftar".


It is fresh and tangy . We love to drink it after fasting . It gives energy and power and makes you feel sooo fresh.


This is the Tamarind . You will  find it packaged and squeezed like this. Just cut the amount you want  into pieces.


Soak into water in the fridge over the night. The longer you leave it the richer flavor you will get .


This is after soaking for the night long. You will find the water turned into the tamarind color .


Filtrate it into colander. Oh yes I love this thing. This bowl is so easy to soak and filter also for washing fruits and veggies.


Taste it. It suppose to be sour if it is the right description . You can add water if you find the flavor too much rich. Add sugar as desired. You are done.


Monday, July 28, 2014

What makes you hate laundry


Laundry means a pile for everybody. I have to say the truth. Like most of us, I hate laundry. I used to have a pile of laundry all the time. I always have the same problem with my baby that he has  nothing to wear after all his clothes dropped  in laundry basket screaming for wash. I have to spend two or three days getting rid of laundry pile every week with hard working washing  machine and no extra space to hang out the wet clothes.

I live in a good weather environment. Dryer for us is an accessory that we will never think of when we buy home machines because we already have a good, hot and shiny weather to dry clothes . The washing machine already rinse the clothes up to 70% dryness or more. We hang the 70% wet clothes in balcony for fresh air and  shiny sunlight killing germs. Sounds good, but I still hated the laundry. Before I go to my problem let me think about what makes most of women hate laundry and have pile of it.

Bad weather


If you have a bad weather in your environment, it means that you will not make your laundry for today. This is an easy solved problem by finding a room in your home that has a good amount of natural light and with internal rack you are done.

Too lazy


I have to stop here to think about the reasons make you feel lazy about the laundry like :

Long process


We all think that laundry takes forever to be done. Very long process to be run. drop clothes in laundry basket, divide them, check pockets, wash them, dry them if you have dryer, hang them, collect them, fold them, iron them and put them in closet, them, them them ... lol . Sounds too many steps with them. This frustrates you as any long process to do in home.

Heavy washing basket.


If you have a pile of laundry which looks like weights in your hands, you will be the most frustrated wife in the world. You will spend the whole day washing clothes with long programs in your washing machine. They are too many and you are too busy.

uncleaned balcony or laundry room.

If you have balcony  that's full of dust or a messy laundry room, this will be a main reason to make you hate laundry. It is just because sometimes we ignore the balcony as if it is not a part of the home. Like it is outside and always full of dust and it takes a long process to clean.

So how to make it easier and overcome these problems? here you are some tips

Overcome bad weather


As I said if you have a bad weather like one or couple of days, dry your clothes over an internal rack. If you have bad weather most of the time, dryer must be added to your laundry room if you don't already have one.

Overcome the heavy baskets


Sometimes you are in a hurry and bring some clothes to wear from the closet, wear them and you change your mind or you will not wear them for any reason. After a while when you organize,  you will not be sure is this is uncleaned or what and it ends up to be in the laundry basket. Have a moment to drop them in a place you know, instead of throwing them in the ground. Same goes for work clothes you wear for one day. Just hang them into fresh area and they will return like new. Don't think it is easy to put all clothes around you in
the laundry basket. Plus I will share with you my routine that overcame all of problems we mentioned above in the next posts.

Overcome uncleaned laundry room

Don't  ignore your balcony. Treat  it as a part of your living room. Clean it whenever you clean your home. Also make your laundry room a beautiful place for you like adding some frames, plants or table with a flower vase. this will motivate you for going to balcony or laundry room too many times.You are done.


I like to hear from you . what makes you hate the laundry. On the other hand if you don't hate laundry tell me why do you like it. What makes you like it. I am waiting for your feedback and comments. See you next post

Saturday, July 26, 2014

Free baby dresser labels

I shared my baby dresser while ago and  I would like to share also the cute labels I made for this adorable dresser

Free baby dresser labels

Feel free to download it from here. I hope you liked them . I think they are so cute aren't they ? I am waiting for your comments and feedback. See you next post.

Friday, July 25, 2014

How to make candy toast

I don't know exactly where is this recipe from. I have been taught this recipe so many years ago when I was child. This recipe is very light, crispy  from outside and soft from inside. It is very easy and it is made mainly from toast bread.

How to make candy toast


The ingredients: 

1 bag of toast bread.
1 small bowl of water.
Oil to fry

For the syrup:

2 cups of sugar
1 cup of water
1 small spoon of lemon juice.


First, cut off the brown edges of the toast bread piece.

How to make candy toast


Cut the white part into quarters.

How to make candy toast

Flat the pieces with the rolling pin.

How to make candy toast


Roll the piece and wet your hand with some water to close the end of the roll

How to make candy toast


Do the same for all the bread pieces.

In a medium heat and small pot put the sugar and the water. Don't stir just leave it to boil until you get the thickness you like for the syrup. The syrup need to be cool before using it.

Fry all the pieces in the oil over a medium heat. Try to be fast and careful because they turn into gold very quickly.

Get out the rolls from the oil and immediately drop them into the cool syrup. Leave them for 30 seconds and get them out of the syrup.

How to make candy toast


You are done. Just feel free to eat with chocolate syrup, with cream or with nuts. I hope you liked the recipe. See you next post.

This post has been featured/shared in 

Featured on Morsels of Life: Five Friday Finds
Featured on

Wednesday, July 23, 2014

Quick Organizing Tips : Exact baby milk standard every time

I like to share this little cute tip with you . I don't rely compeltely on baby milk bottles but sometimes I need it. When I open a new baby milk tin I like to cut the metal cover just like this.


Quick Tip : Exact baby milk standard every time


When I make the milk bottle I like to have an edge to sweep the standard spoon in it to get the right amount of milk each time

Quick Tip : Exact baby milk standard every time


I liked the idea so much.  You can use a tape to do the same concept. You can also it in all your seasoning.

Quick Tip : Exact baby milk standard every time

Quick Tip : Exact baby milk standard every time


I am waiting for your feedback and comments. If you have any question I am happy to answer you. Thank you for reading. See you next post.

Tuesday, July 22, 2014

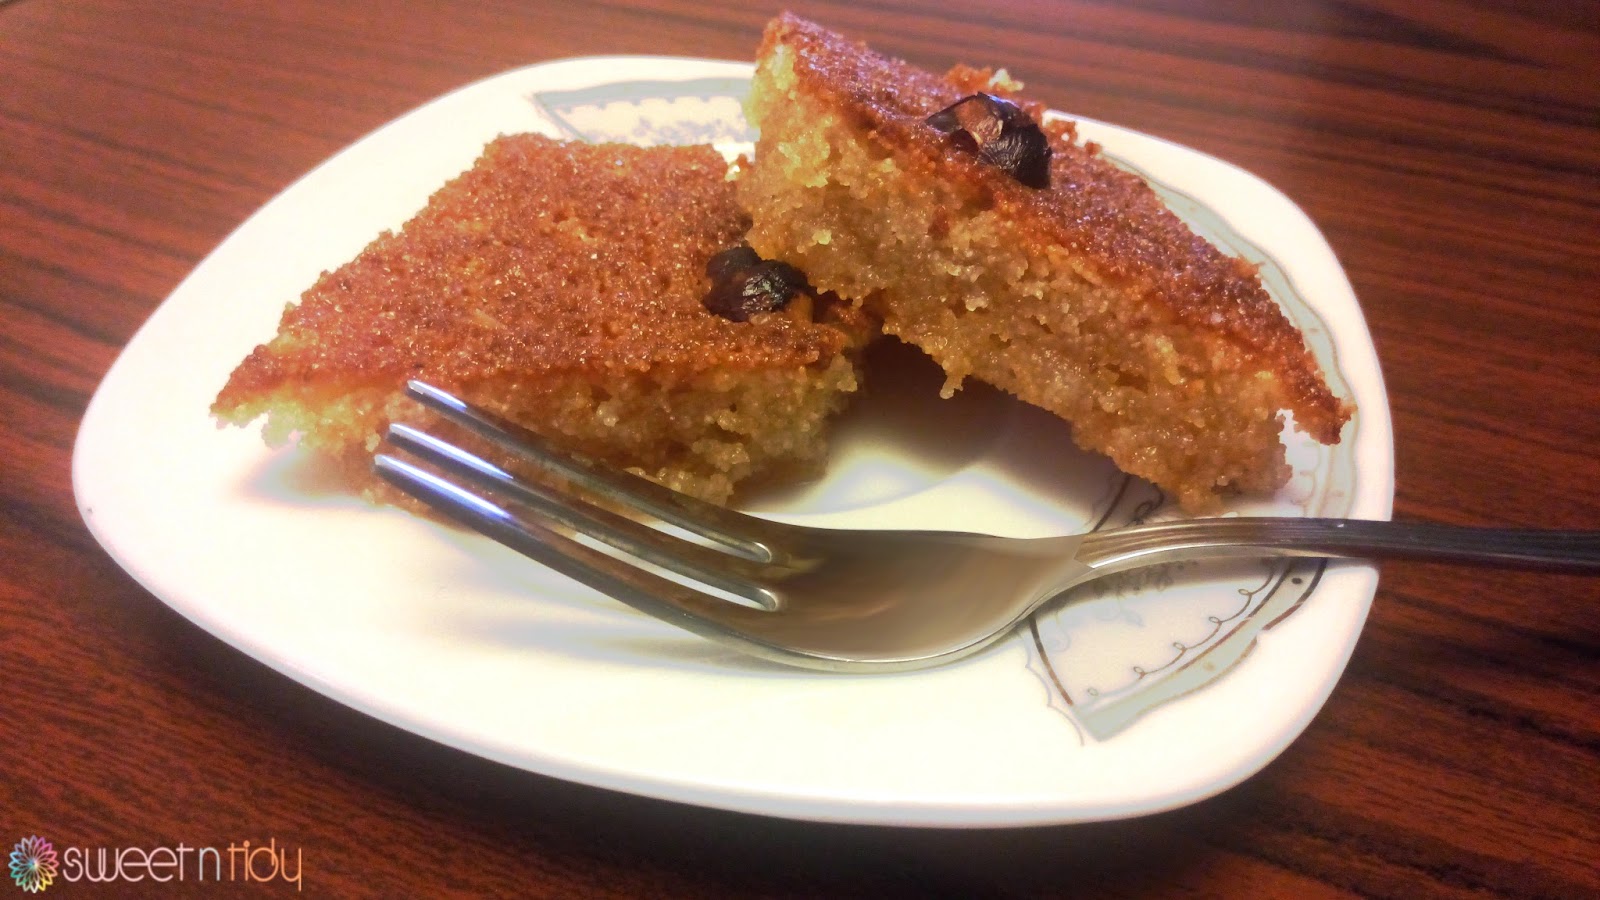
The secrets of the soft Egyptian Basboosa

Basboosa is a very famous dessert in Egypt. It is always eaten with a cup of tea after the "Iftar". I like it. It is very tasty and sweet. It is very soft and delicious.


The secrets of the soft Egyptian Basboosa

The only problem with this easy dessert is how to make it soft and successful. Most of new house wives mistakenly make it very hard. Today I will show you the tricks and secrets of making the easy tasty soft Basboosa.


Basboosa is made mainly from Semolina flour. Which is very useful for human body.  I promise you can find all the ingredients in your country.

The ingredients :

1 cup of semolina flour.
1/2 cup of sugar
1/2 cup of animal margarine.
1/2 cup of cream or yogurt
1 tbsp of baking powder.
1/3 cup of grated coconut (This is optional)
Nuts for decorating and also for rich flavor.

For syrup :

1 cup of sugar.
1 cup of water.
1 small spoon of lemon juice.
1 tbsp of margarine.


First put the semolina and the coconut in a bowl and add the margarine. Slowly mix them together until all the flour mixed with the margarine.

Secret no. 1

If you added a lacteal to semolina  it will make something called gluten which makes the mix gets hard in the oven . That's why we add the margarine before the cream or the yogurt. the margarine will cover the semolina and make layer between the semolina and the cream. This is one of the secrets of making soft Basboosa.

Secret no. 2

We slowly move the mix. Don't hardly mix it because mixing the mix so hardly make hard Basboosa as a result.

The secrets of the soft Egyptian Basboosa

Add the sugar, cream or yogurt and baking powder to the mix and slowly mix them until you get the following texture.

The secrets of the soft Egyptian Basboosa

In a 28 or 30 size tray  covered with a margarine layer add the mix. With your spatula make the mix  flat over the tray.

The secrets of the soft Egyptian Basboosa

The secrets of the soft Egyptian Basboosa

The secrets of the soft Egyptian Basboosa

put the nuts sequentially and put it in the oven under 180 degree.

The secrets of the soft Egyptian Basboosa

The secrets of the soft Egyptian Basboosa

In a small pot and on a medium heat, add 1 cups of sugar and one cup of water . don't stir. When the mix is boiled add the lemon and leave it to boil until you get a sweet syrup. Turn the fire off and when the mix get warm add a tbsp of margarine to the syrup and leave it to melt.

Secret no. 3

Never stir a dessert syrup. It will make some crystal sugar on top if you stir it. Just leave the syrup to boil without moving it.

Secret no. 4

The spoon of margarine make the Basboosa gets soft and good texture. 

Back to Basboosa. When you find the edges turned to brown turn off the lower heat and turn on the upper heat and watch it until you get a golden surface and turn off the heat.

Don't get out the Basboosa from the oven. Turn on the fire for the syrup until it boils again. Now get the Basboosa out and pour the syrup immediately  over the Basboosa slowly. When you find the Basboosa stopped to absorb the syrup stop pouring and cover the tray leaving a small whole to breath. You are done.

Secret no. 5

In any recipe of dessert that needs syrup, we usually have to have one of the syrup or the dessert to be cold and the other to be hot. But in Basboosa both of them neeeed to be hot. This is a top secret of soft Basboosa.

Secret no. 6

When you cover the Basboosa you prevent it from getting hard and we left a small hole to breath because we don't want the steam to turned into water and destroy everything.

The secrets of the soft Egyptian Basboosa

Cut it and you are done.


The secrets of the soft Egyptian Basboosa


Tuesday, July 15, 2014

Readers Corner : A fridge full of colors.

My sister is living outside the country and she is one of my permanent readers. It doesn't seem to be real reader corner because she is my sister it means someone who I know. But I still wait for you to send me your photos and projects. She is inspired by my fridge tour post and she liked to do the same for her fridge so let's get the tour started.

Readers Corner : A fridge full of colors.

Readers Corner : A fridge full of colors.

Readers Corner : A fridge full of colors.

Readers Corner : A fridge full of colors.


Actually I liked her fridge so much. It is full of colors of veggies and fruits in colanders. I also like how she put juice and milks she uses in breakfast for her kids every morning before they go to school in baskets so that she can pull them easily.  

I hope you liked her fridge as well. I am waiting for your comments and feedback. what do you think about the fridge? See you next post.

Monday, July 14, 2014

How to organize manuals


How to organize manuals

I took a long time enhancing this project. I have inspired the idea from Alejandra Costello. She has already poly envelopes made already for binders and each holds up to 200 papers. She also got little cute tabs to label her manuals. She has two manual binders, one for things that she will leave when leaving the house and other for expensive things she buys.

Unfortunately I have totally different circumstances. that's why it took me some times to think and apply.We don't have same products in my country. I was looking for poly envelopes for binders and I didn't find any. I also couldn't find A4 poly envelopes also I didn't find A4 binders. We take everything when we leave houses. We don't leave anything when we leave so I have to have only one thick binder to store all manuals. How did I come over all of these problems? Check this out.

How to organize manuals

How to organize manuals

I got normal clear A3 poly envelopes and one think binder. I have punched the poly envelopes myself with the puncher. It was hard to punch them all at the same position point but I figured this out finally. I marked the points and I removed the lower part of the puncher - that holds the circles come from punching- so that I can see the marks I did from the back of the puncher. This way I punched all the poly envelopes in the same exact position and they are now ready to go inside my binder rings.

How to organize manuals


 Unfortunately this poly envelopes were a little taller than the binder, so I couldn't add any extra tabs over. This would be very high and would not look pretty. And this what I did


How to organize manuals

I just labeled the top of each poly envelope without any tabs. That way I can see what the categories are. 

How to organize manuals


If I put all the same category manuals in the poly envelope they will all fall in the bottom of the envelope and I will end up with very think binder. You may noticed that I don't have a very thick manual binder. This because I came up with this beautiful solution.

How to organize manuals

How to organize manuals

 I sewed the center of the poly envelope with the sewing machine. Now I have two pockets in each envelope for the same category and the manuals will spread over the envelope and not falling to the bottom of it creating a thick envelope at the end. That's because I noticed that most of the manuals come with half A3 size.

How to organize manuals


 I sub-categorized the categories. For examples I have all my temperature machines manuals in the same category. I just sub-categorized them into two sub categories, the machines that make high temperature like heaters and warmers and the machines that make low temperature like air conditioners and fans. 

How to organize manuals


Same goes for electronic devices I sub-categorized them into devices that we use inside house like land line telephone and devices we use in outdoors like cell-phones and cameras. 

How to organize manuals

Of-course computers&networks will be divided into computers and networks sub-categories.

How to organize manuals

Kitchen is divided into small  machines like boilers or coffee machines , and the big machines like oven and fridge.

How to organize manuals

For entertainment category, ummm ... I didn't find a good sub-categories. They all are around the TV. The receiver , xbox and DVD player. Maybe if I have a piano I will find something.

How to organize manuals

A good tip I want to share here is that I group the warranties and the receipts for each device together with a  paper pin . For example the xbox came with too many small different languages manuals. I grouped each three of them with a rubber band and inserted them sequentially.

May categories are 

Electronic devices  (In home -  telephones, irons ...etc / Outdoors - camera, cell-phones ... etc  )
Computers & NW (Computers  - USBs, DVD reader ... etc / NWs - routers , access points .. etc)
Beauty (Hair - blow dryers, flat iron ... etc / Others - sunglasses warranties, lash curler .. etc)
Baby stuff (Furniture - baby bouncer, baby walker ..etc/ Food tools -  milk bottles , spoons .. etc)
Temperature (High - heaters, warmers .. etc/ Low - air conditioners, fans .. etc)
Kitchen ( Big machines - fridge, deep freezer ... etc - Small machines - coffee maker, boiler... etc)
Furniture (Wooden - library, chair ..etc - Accessories - expensive vases , chandeliers .. etc)
Entertainment

You can add or adjust as you want. This is your categories and you are free to do what you feel and like.

How to organize manuals

I put the label on the binder.

How to organize manuals

and I put it in my office.

So that was how I organized all my manuals. I hope you liked the post and found it helpful. Have a food time and comments please if you liked the post. See you.


This post has been featured/shared in