Showing posts with label Free. Show all posts

Wednesday, July 30, 2014

How to organize origami papers

As I said before I am so crafty person . I like crafts so much . I have  too many origami papers which I use to make very beautiful origami shapes. All what I did to organize them is to get a shoe cardboard box and covered it with contact papers and made cardboard dividers for it.

How to organize origami papers


Here is how to do it

How to organize origami papers


I cut 3 pieces of cardboard  W x H and two pieces D x H. In equal spaces I cut  H/2 stripes inside the cardboard pieces to make room for the mutual cardboard pieces to in like a mesh. It now fits all my origami papers . Also my folded origami pieces .

How to organize origami papers

A quick tip . If you have small pieces of origami papers remained from your projects just group them with elastics  or rubber bands. 

How to organize origami papers

And this is how I organize my origami papers. I also grouped them by colors to make it easier to use.

How to organize origami papers


I hope this post was helpful . I like to see your comments and send me your pictures about any craft organizing you made. Thank you for reading . See you next post

Wednesday, July 23, 2014

Quick Organizing Tips : Exact baby milk standard every time

I like to share this little cute tip with you . I don't rely compeltely on baby milk bottles but sometimes I need it. When I open a new baby milk tin I like to cut the metal cover just like this.


Quick Tip : Exact baby milk standard every time


When I make the milk bottle I like to have an edge to sweep the standard spoon in it to get the right amount of milk each time

Quick Tip : Exact baby milk standard every time


I liked the idea so much.  You can use a tape to do the same concept. You can also it in all your seasoning.

Quick Tip : Exact baby milk standard every time

Quick Tip : Exact baby milk standard every time


I am waiting for your feedback and comments. If you have any question I am happy to answer you. Thank you for reading. See you next post.

Friday, June 27, 2014

My first aids set in my purse

I like to carry first aids set in my purse to use it when I need it. This is really helpful when something accidentally happen. If you have kids, this will be very important and you can't ignore it at all because children like to run everywhere and play and sometimes they got infection from other children. This is necessary for adults as well because sometimes you may get injured while you are trying to open something sharp or burn when you touch something hot.


Again I made a small bag out of old jeans that I had.

My first aids set in my purse

I cut out a rectangular shape piece of jeans and fold it into half horizontally. then I connected the short edges to the zipper and sewed the long edges. Let's have a look inside

My first aids set in my purse

Cotton pieces, germs killer or Alcohol, betadine, first aid pads, burns ointment, antibiotic ointment, digital and analog thermometers, aspirin, cold tablets, pain killer, antiemetic and ear infection dropper (if you are going to the beach or something).

My first aids set in my purse


I filled the Alcohol and betadine in washed and dried eye droppers containers with syringe. This will make them easy to wet a piece of cotton with.

My first aids set in my purse

Again, control the mess concept is applied here because I don't want 0.00000009% of possibility to have a leaked betadine over my stuff. So I cut pieces of plastic bags and cover the top before I close the caps.

My first aids set in my purse

In this eye contact container I put burns ointment and antibiotic ointment. I liked this idea I came up with because it suites what I need.

My first aids set in my purse


I hope this post was helpful and I would like to see your applies and your comments, feedback and responses. Thank you for reading and see you next post.

Monday, June 23, 2014

My baby travel size shower set


Hi Sweeties. I would like to share my baby travel size shower set that is always inside his diapers bag. It is useful when I go to my mother for two days or something.


My baby travel size shower set


I mad this small bag out of old blouse. I cut a rectangular shape piece of fabric and connected the short ends to the zipper. Face the wrong side of fabric and sew the long ends. Let's have a look inside.

My baby travel size shower set

There's baby lotion, baby powder, baby oil and there's a baby shampoo in the very deep inside.

My baby travel size shower set

Here is a close view 

My baby travel size shower set


I filled the baby powder in a toothpicks container. This was brilliant cause this container is the best travel size for filling a powder inside. Have a look

My baby travel size shower set

My baby travel size shower set

It has super convenient holes for powder. One is big and the other is dotted.

My baby travel size shower set

The baby lotion container was a vitamin tablets container. This is not the same design but to show you what I mean.

My baby travel size shower set

Of course the shampoo container was a shampoo container but this was for general shampoo. When it got empty I washed it and refilled it with my baby shampoo. The label is a little blurred because of some shower reasons :). If you want these labels just leave a comment below.


My baby travel size shower set

The baby oil is refilled  in and old washed eye dropper container. I refilled it using syringe. It took me some time but worth.

My baby travel size shower set

Remember the control the mess concept we have learned weeks ago? I applied it here because I don't want the shampoo, the lotion or the oil to leak outside and make an uncontrollable mess. So I cut pieces of plastic bags and cover the top of each container before I close the cap. This way it will tightly close and will not leak outside the bottles. 

I hope you liked this post and I want to see your comments, feedback and responses. Thank you for reading

Saturday, May 24, 2014

TV side-table organizing

How nice is it  to think of new use for something you have around your house and you find it perfectly fitting your demands. This was a desk organizer as you see. But I used it for organizing TV remote controls and TV guide. It fit perfectly my stuff there next to the tissue paper box and ashtray that we use it for small garbage. We don't smoke but I admit I have cutest ashtray ever!!

Living room organizing TV side-table organizing

I like it. It holds my TV, receiver, DVD and HDMI controls. It is wooden and super cute and has pocket for each one with bigger pocket at the back holding the TV guide.

Living room organizing TV side-table organizing

What I wanted to say is to think outside the box of a new use for things around your home that you don't use or you don't need. Don't go directly to supermarket spending your money in buying baskets and bins while some containers in your house try to find something to do. Think of what else can I use this for. What else can I store in this. What looks like this shape that fits here. etc..

I will make you some tips on how to keep your living room clean most of the time however busy you are. Wait me for the next post. I hope you liked this post and found it useful for you. Waiting for your feedback responses and comments. If you like to share any  organizing project I will be glad to share it here in my blog. See you next post.

Tuesday, May 13, 2014

DIY : Changing table organizer for baby

It has been a long time not to  post on my blog. I really missed blogging. I had to have some time focusing on some duties of taking care of my baby and back again to the track and I think it's time to come back again.

Before going into this lovely project, all the changing needs used to be on the side table which actually my makeup mirror counter. I don't have changing table so I used my baby bed as a changing table putting a mat under him while changing.

I was thinking about plastic door organizers and fabric remote control organizers we used to see around the internet. So I made this one by my own and it REALLY WORKS. All what I needed were fabric from my craft room, sponge sheet, scissor and sewing machine. I am not very good in using sewing machine. Actually I don't have one, but my mother in low has and with a little of help we have done this gorgeous organizer.


DIY : Chaning table organizer for baby

Just cut double layers of fabric that fits the height and width you need facing the wrong side of fabric out and putting single layer of the sponge sheet on the top then sew the edges except one edge that allows you to turn the fabric to the right side, turn to have the right face again and close the last edge. With the same concept create the pockets and attach them to the long piece of fabric.

I attached the organizer to the bed by some threads. Let me take you in a tour.

DIY : Chaning table organizer for baby


In the very first pocket he has his changing mat folded, some diapers and baby changing lotion.

DIY : Chaning table organizer for baby

The second pocket he has some of stuff he uses every day like hair brush, his dummy, perfume and if he currently takes any medicine.

DIY : Chaning table organizer for baby

In the very last pocket I put for him reusable milk tins that I used for paper towels, home made baby wipes ans small size trash bags to put dirty diapers inside them ...tie them strongly ... you know for the smell :D.

DIY : Chaning table organizer for baby


If you want me to make a post about  how to do it step by step or if you like to know how to make your own baby wipes or how to roll trash bags in a tin please leave a comment below and if you have any project that you like to share please send me on my E-mail . I will be happy to share it here in my blog. see you soon

Friday, March 28, 2014

Reuse it : Sticky notes holder to store drink coasters

Another quick post I wanted to share. I was thinking about the square shape of the drink coasters that we all have cluttered everywhere in the house. We get them everyday as commercials when we go to any store we get them for free in special occasions like new year, Christmas and so. It looks like sticky notes squares, so I thought about the sticky note holders to store them different wheres in the house.

Reuse it - Paper note holder to store drink coasters


Again, it's in no time, free and inexpensive. Let me know your feedback, comments, questions and responses. Your responses will be the next talking center of-course

Thursday, March 27, 2014

I am inspired : Easy free bathroom organizer in no time

One of my quick projects I adore, is this simple shower organizer I have inspired from Real-Simple. While I was searching about bathroom organizers, I got some great pictures that most of them depend on drilling the walls which is not an option for me or for you if you are renting the house. I can't have too many holes in the walls everywhere specially for cabinets and shelves. So I had another options.


I am inspires how to organize bathroom free shower organizer

Yes exactly !! In my kitchen. This baskets tower I used for a long time to store onions and potatoes and I didn't realize that it has gorgeous baskets you can use anywhere else. I spent too many times thinking what else can I store in it ? I had nothing else to store here, and I missed to ask where else can I use baskets that I don't need. I removed the last basket and you can guess where did I  use it :D.

I am inspires how to organize bathroom free shower organizer

I removed it, and with a thick road I hanged this beautiful basket in an pre-installed hook in the wall to store all  my husband, my baby and my shower supplies. It looks beautiful, gorgeous and it is inexpensive. I didn't pay anything for it and I made it in no time without drilling in the wall. Isn't it look Sweet N Tidy :D?.

I hope this was helpful for you. Everybody has a adjustable basket towers somewhere. You can do it.I am waiting for your comments, questions, responses with pictures and projects and your feedback. Your responses will be the next talking center next time of-course.

Sunday, March 23, 2014

Free front door organizer at no time

Most of husbands like to free their pockets once they come home. Their pockets have the money, coins , receipts, wallet and accessories.

With a little effort, you can help your husband, father, brother, son .. etc, to get organized immediately with no time or effort.

This was my front door before organizing. The counter is messy with accessories and receipts.

Free front door organizer at no time

First of all for the coins I used this coins manager but I didn't like it's look, so I covered it with contact paper

Free front door organizer at no time

Free front door organizer at no time

My Husband doesn't like to make everything to be REALLY OVER organized, so I didn't get  the organizers that divide everything like cell phone, accessories and keys. It wasn't suitable for my husband.

So I got this bowl as a gift from my mother in law and it looks gorgeous. When my husband comes he puts everything inside and that's all. And for everyday receipts I simply put an envelope inside.


As you see I organized the front door and helped my husband to get organized in no time for free. I am sure that Everybody has a bowl somewhere. It's free and easy. I am waiting for your feedback, responses, comments and questions. Your responses will be the talking center in the next post of-course.

Thursday, March 13, 2014

Free decorative item around your home

Its true I go with the concept of throwing away anything you don't need, but if it really looks reusable, why don't we keep it? especially when it returns to be useful. This decorative plate I got from the supermarket and it was holding some dates.

Free decoration ideas in your house

It looks clean and tidy like you can not throw it away without asking yourself what can I use it for ? 

Free decoration ideas in your house

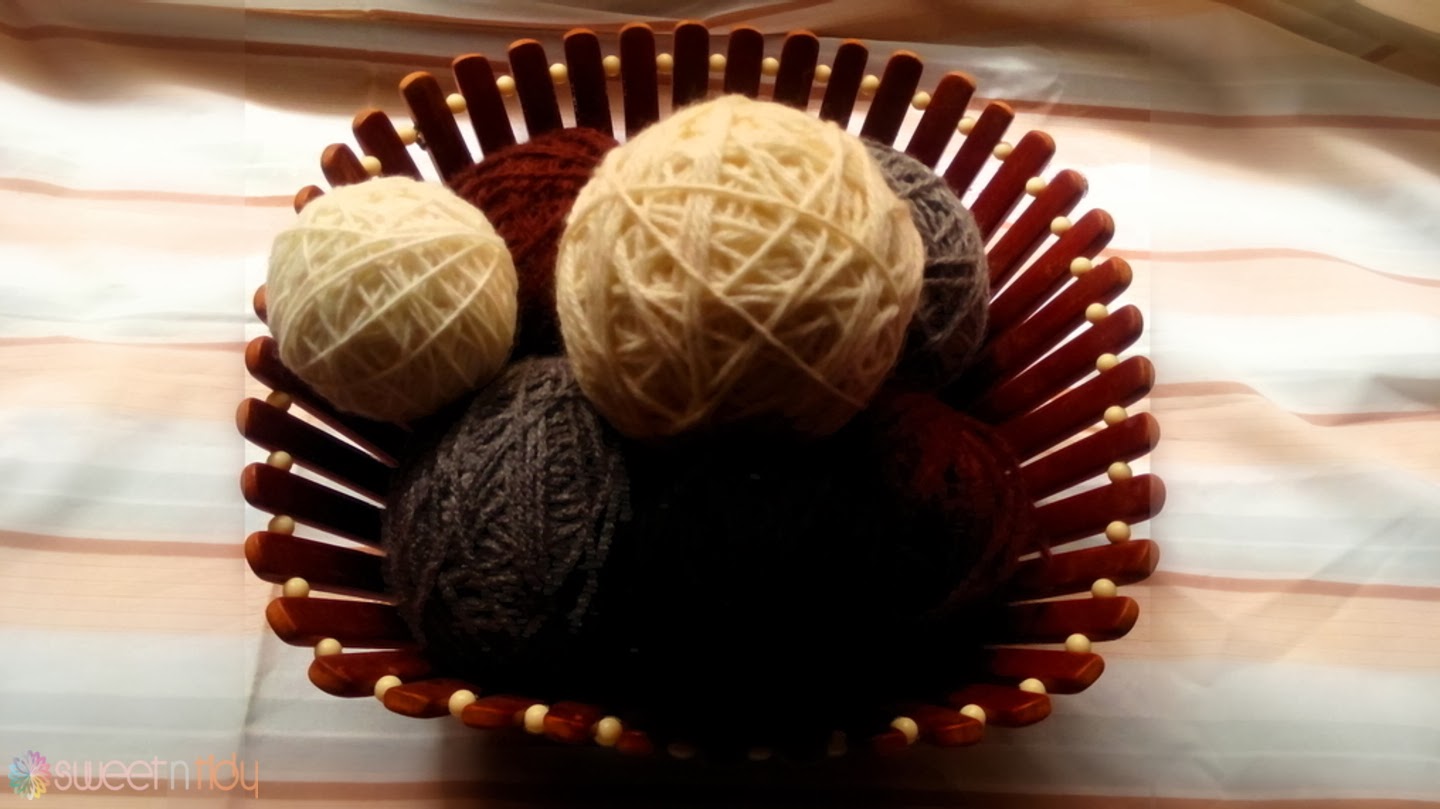
Actually you can use it for too many things. But I was thinking to use it as a beautiful decoration piece. When I was in a tour in Ikea, I saw these little gorgeous decoration torka balls.


They are simple and uni-colored. I loved them but I didn't buy them. I was in a harry and this little beautiful plate came into my way while I was organizing. I was in my craft room organizing my coroche rolls.  Coroche often comes with this shape.


Free decoration ideas in your house


I turned them into nice balls shaped like this.

Free decoration ideas in your house

It looked much similar to the balls I saw in Ikea. I just secured the end of the thread by passing it through the ball. I don't know if you can see it. I did my best to catch it with the camera.

Free decoration ideas in your house

I came up with some colors and made the same thing. I picked the colors matches my living room colors.

Free decoration ideas in your house


And with my beautiful plate I made this nice look.


Free decoration ideas in your house

 And for this nice bowl, I bought it from home store and it was inexpensive. It cost few cents.

Free decoration ideas in your house

 Aren't they look simple, tidy and beautiful decoration pieces? Please let me know your feedback, responses and comments. Your responses will be the next talking center of-course. I am waiting for your pictures and ideas about home organizing and DIYs.