Monday, April 27, 2015

Tasty meal in 10 min


Baking is one of my fun challenges I really love, specially when it is in the very early weekend morning. I love the smell , the atmosphere and the warmness coming from the oven. It feels so family time. Right?

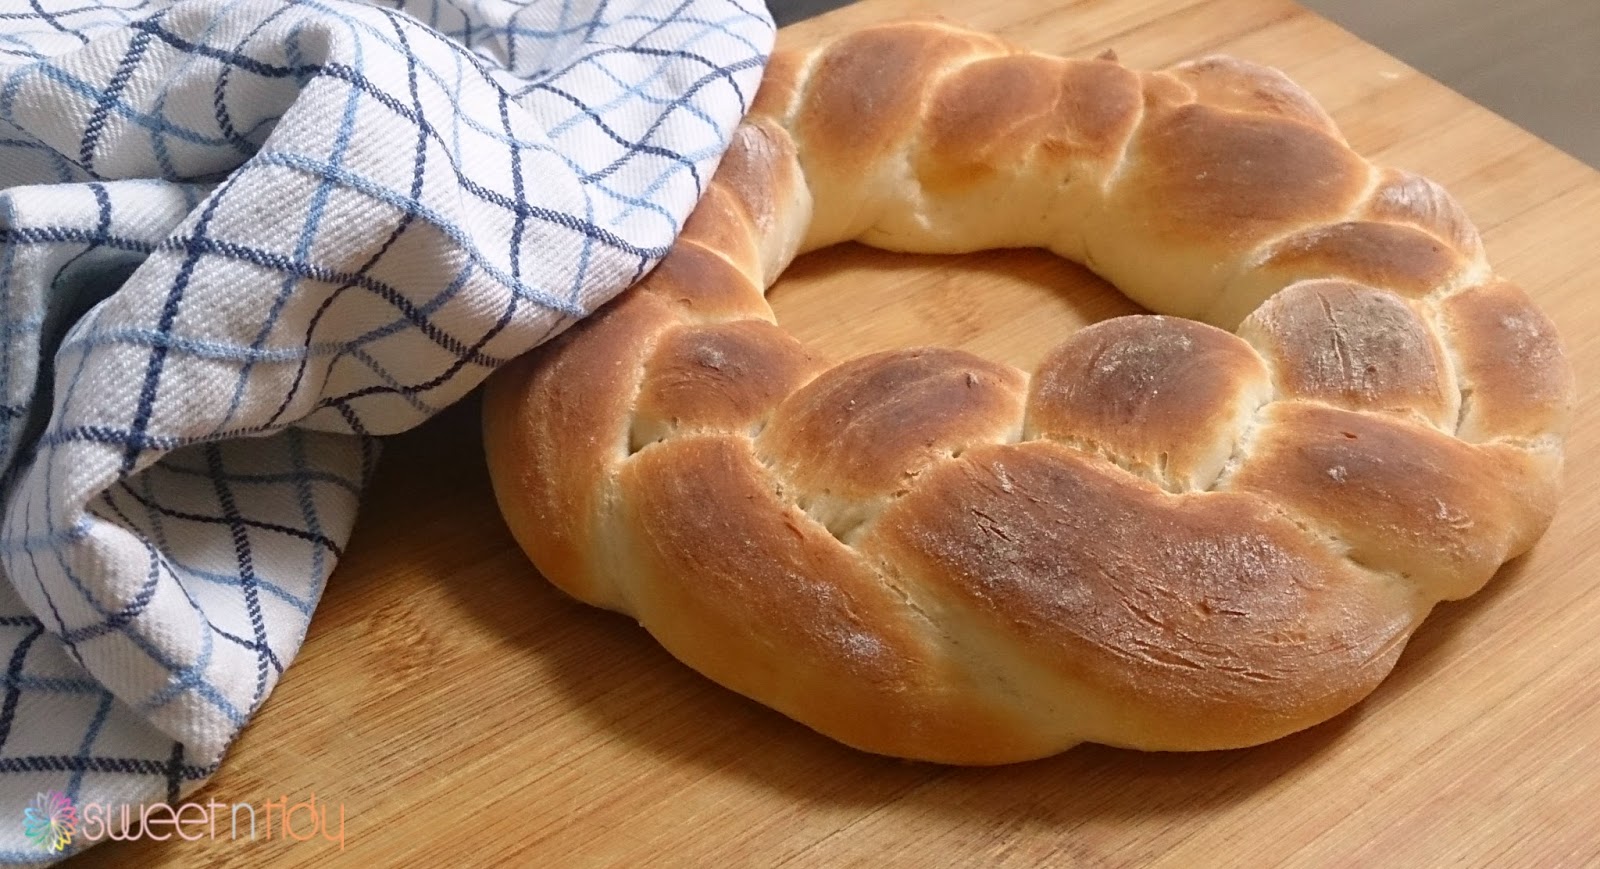
This beautiful pastry took only 10 minutes to prepare.


Tasty meal in 10 min


 The secret of this pastry depends on a fact. The more liquid dough you make , the more active yeast you have. So the half of the flour amount has to be added to the full amount of the water with the yeast and sugar as a start. Then leave the yeast to work with the sugar for 10 minutes before shaping the dough.

Tasty meal in 10 min

Ingredients


This amount is enough to make couple of braids.

2 1/2 cups of baking pastry flour.
1 cup of warm water.
10 gm or 1tbsp of dry yeast .
1/4 cup of oil or butter.
1/4 cup of sugar.

How to do it


1 - Add the half of the flour amount ( 1 1/4 in this case ) with the whole amount of water (1 cup) in a big bawl with the yeast and the sugar and mix very well.

2 - Leave the mix for 10 minutes in a dark and warm place.

4 - After that, add the oil or the butter and the other half of the flour amount and mix until you get non sticky dough. This may require a little bunch flour or a couple millimetres of water according to the flour you use. Don't worry if your dough sticks a little bit.

5 - Turn on your oven to 180-200 degree.

6 - divide the dough  into two parts. Take each part and divide it into three medium tubes and create a braid. Attach the end of the braid with the start of it. Put it in a baking tray.

7 - This is optional step. If you want the dough to have more and more size. Turn off the oven and leave your first braid into it to enlarge while you are preparing the other braid.

8 - Bake in 180-200 degree for 15 minutes for each braid.

9 - Turn the top of the oven on to create the brown top. You don't have to add egg or coffee or anything.


This beautiful pastry called "Shoreek" in Egypt. It is great as a breakfast or dinner. You can see how cottony and fluffy it is from the inside.

Tasty meal in 10 min

I really love it. I also bake this beautiful pastry whenever we feel hungry or between meals. Easy and fast. Try it and tell me. I like to hear from you. Leave a comment if you want more easy and simple recipes for dinner, breakfast or snack. See you in the up-coming posts.


Friday, April 24, 2015

Organizing medicine


Our beautiful bathroom has a very small medicine cabinet, so I keep all our medicines and vitamins in a home care area we established couple of months ago. It is really a fantastic feel having all medication in one place. Easy find, easy grab and easy put away.

In addition to my toddler medication, we keep our vitamins, first aid, medicines and some medical tools. I decided to keep our toddler medication in his closet as a trick to avoid jam-packed stuff in one area.

In order to organize our medicines, the first step should be purging all expired stuff or medicines that will not be used again like surgery or pregnancy medications. Then I started to categorize them according to the reasons. When I have a pain in muscles I am not sure if I have a bill, spray or gel as a pain killer for it. So categorizing medicines according to type is not working for me.


How to organize medicine


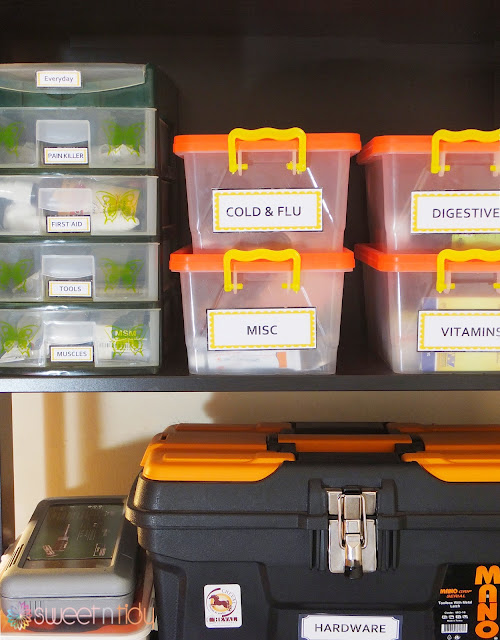
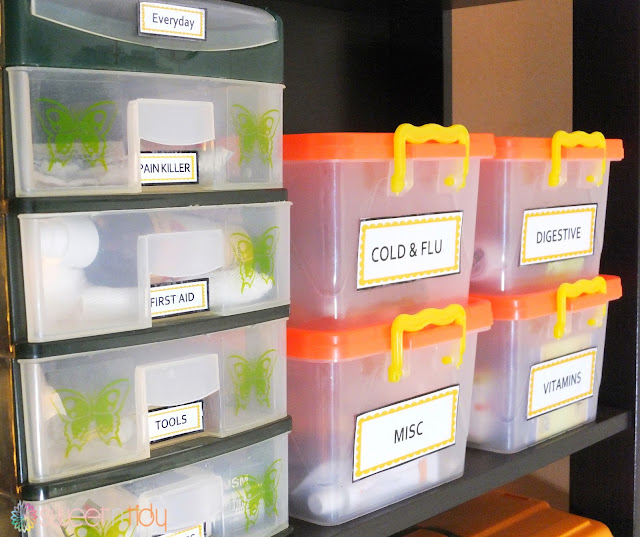
For this easy cute medication system, I chose easy system for less used stuff, easier one for more used stuff and the easiest for the most used. I purchased these boxes in an inexpensive price. I put the digestive and flu medicines on top because we use them more. Other medicines and extra vitamins in the bottom.


How to organize medicine


I love drawers for easier access, so they are convenient for more used medicines. Pain killer and first aid need to have easy home and because we use the muscles and bones medicines the most, I chose to put them in drawer as well.


How to organize medicine


Everyday vitamins and medicines are kept on the very top section in the drawer box for the easiest reach. Courses medicines - like antibiotic in case of flu-  are kept there in order not to miss them.


How to organize medicine


Tools that we use during medication are also kept in one of the drawers. Syringes,  fever patches and thermometers are all in there.


I am looking forward your projects to inspire me. Tell me how do you keep and store your medicines. How does it impact to your daily routine. Comment and subscribe in order not to miss any post. See in the next post.
                                                            

Saturday, April 18, 2015

Organizing kitchen utensils

Although I do not have that much of kitchen utensils, they were jam packed inside the kitchen drawer. It was hard to find one of them in there without getting a little hurt because of a gadget somewhere in the drawer.

They had unknown place with the other kitchen tools in the drawer until I found those cute holders for kitchen utensils in "Carrefour". They were pretty cheap and really useful for my everyday use utensils.

Organizing kitchen utensils

They act as a very convenient home for the kitchen utensils that I use everyday. What is also nice about these holders that they can be hanged next to the stove or working table.

First of all purging is a must for utensils specially when they are duplicated or some of them are out of use for a long time.

Organizing kitchen utensils


Categorizing them was the next step, I was thinking about ( bake , cook , serve ) way to organize my utensils. But since I am not baking too much and I use only one whisk for only cooking sauces, I was thinking about preparing, cooking and serving food as categories. So I got my label papers and printed out some elegant labels to decorate the cups and add more functionality to them. 


The prepare cup holds all the utensils I use in preparing food. Silicon brush , spatulas, strainer, vegetable peeler , lemon squeezer, meat cutting knife and also kitchen scissors. I suggest also any utensils used in preparing, cutting and cleaning food such as fish peeler or potato masher.  In cook cup there are whisks, draining spoon and tongs. Last but not least in serve cup there are cake and pizza serving spoons and ladles. I also have a place there for spaghetti serving spoon and ice cream spoon .


Organizing kitchen utensils

I chose my kitchen cart as a home for these cute holders and they are so handy there. They really took few minutes to finish.  Do you have any other solutions for your everyday use utensils ? Looking to see you in the up-coming posts and looking more for your organizing projects to share.

Thursday, April 16, 2015

Happy Easter + Back again

It has been a long time since I released my last post. I really missed my few beautiful readers and I missed blogging so much. It was a hard way to go through to be able to back in blogging. I was making some changes in house and redesigning some of stuff places.  I just needed some time to get myself organized with bunch of challenges I am living with around my home.  You will excuse me if I said that I have no pantry. No coat closet. No linen closet. No laundry room. No basement or garage. I have smallest kitchen ever. I live in two bathrooms and one kitchen house with no closed cabinets under any sink. I know I can get some extra furniture and wardrobes and add some storages everywhere but as you know, we are renting the house and moving into smaller house is an option and I like to be sure I will not end up with throwing away some furniture plus I like the challenges and problem solving. So I am so excited about coming back and share all my solutions I came up with in the upcoming posts.

you also may noticed that www.sweetntidy.blogspot.com is changed into www.sweetntidy.com. Yes, I made some changes to our blog and I am looking forward a cleaner and neater look for its pages. Also looking forward improving my writing and photographing skills.


It's Easter time. I hope these beautiful Easter eggs give a good reason to forgive me for this long time of absence. And I will take the chance to say Happy Easter for you and please enjoy the beautiful weather as much as you can.

Happy Easter eggs


In Easter and some special events, I like to show up my talent in decorating and DIYing. Easter is a good chance for playing with colors. I tried as much as I can to break the eggs as cleaner as possible with keeping the egg shape at the same time. It took some time but it worth it.

Happy Easter eggs


I also chose my son little basket he plays with to act as a home of my Easter eggs. Speaking about colors and fragile eggs, if you have toddlers do not try this at home :D :D. There were some accidents but they finally went fine. Maybe I should apology for taking his beautiful handmade basket.

Happy Easter eggs

I used bright colors and tried some beautiful shapes and flowers. Wasn't so hesitated to use some black. It gives awesome contrasts. also cutting some light brown scrap papers was a good idea to fill in the bottom of the basket to give that kind of nest look. I loved how they become and they are ready to decorate my home.

Happy Easter eggs

For me I liked not to make the shapes so perfect and show a little hand drawing and  avoiding so sharp and harsh lines and shapes. I like it that way because it shows up the DIY atmosphere and home warmness a little, right?

Happy Easter eggs

Using some color markers would be great also for drawing some shapes and flower. For me I used water colors and it turned out so beautifully also with the paint brush.

So, This is how I decorated my Easter eggs. I like to hear from you how do you spend your Easter time and I will be happy I you share your Easter eggs.